Home > Using CampControl > Photographs > Georeferencing Photographs
Georeferencing Photographs
View this page in Español, Français, Português, Русский or another language.
If your photographs do not already have their latitudes and longitudes embedded into their EXIF metadata records when they are uploaded to your CampControl photo album, you may enter them once they are in the album by following the steps below (If the lats and longs are in the photo at time of upload, they will be automatically copied into the CampControl album database, and the photos will available for viewing in Google earth without any further processing):
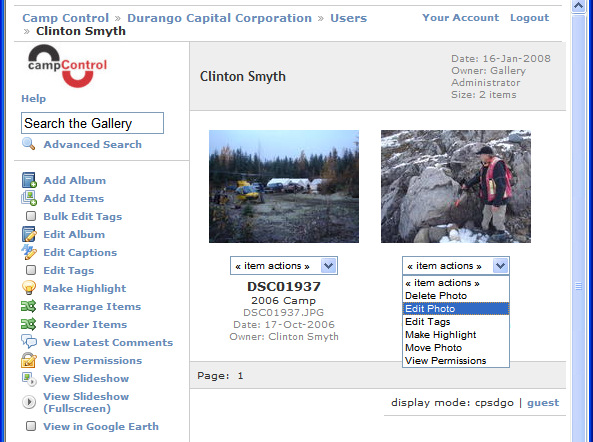
- Navigate to the album which holds the photo to be georeferenced, and select Edit Photo on the dropdown menu available below the thumbnail of the photo to be georeferenced.
- The following screen will appear (if the Google Map tab is not selected, click on it to select it), and the latitude and longitude (in this order in decimal degrees, negative for west and south) of the photograph should be entered into the appropriate field as shown, and then the "Write GPS to EXIF header" button should be clicked.
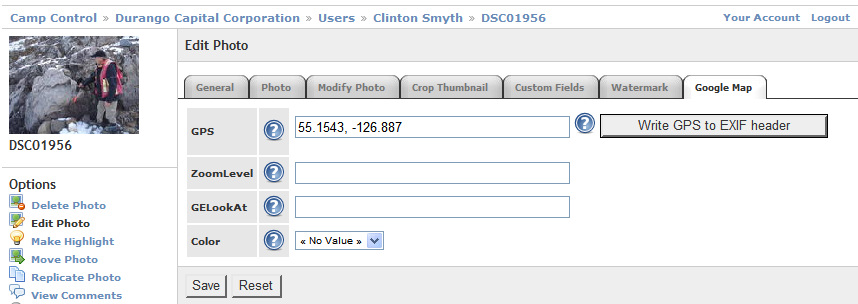
This will write the photographs coordinates into its EXIF metadata records, BUT WILL NOT YET HAVE WRITTEN THEM INTO THE CAMPCONTROL PHOTO DATABASE WHERE THEY NEED TO BE IN ORDER TO PLOT THE PHOTOGRAPH IN GOOGLE EARTH. - Now click on the
 button which will have appeared beside the latitude/logintude field, and then click on the "Save" button at the bottom of the page. This will save the photo's coordinates into the CampControl album database.
 - Click on the image name at the top of the screen or on "Back to photo" in the lower left margin to return to the photograph.
- The photo is now ready for viewing in Google Earth - either individually (to do this, click on the
 menu item in the left margin), or together with all the other georeferenced photos in its album ( by selecting the button while all the thumbnails of its album are in view).
See also